Guides · Using the map
Import a KML or KMZ into Google Earth
The same three steps in each version of Google Earth, the one import option that matters, and the short list of ways it goes wrong.
Updated September 6, 2026
A .kml is a text file of shapes and points with a location for each. A .kmz is the
same file zipped, usually with its icons inside. Google Earth treats them identically, and
everything Prepared Ground ships is a .kmz.
Before you start: unzip the download, not the file
The download is a .zip. Inside it are the .kmz and a few Markdown documents. Extract
the zip first — on Windows, right-click → Extract All; on a Mac, double-click — and
import the .kmz from inside it. Google Earth will not open the .zip itself.
Do not go one step further and unzip the .kmz. It is a zip too, but Google Earth wants
it intact.
Google Earth (web)
-
Open earth.google.com and sign in.
-
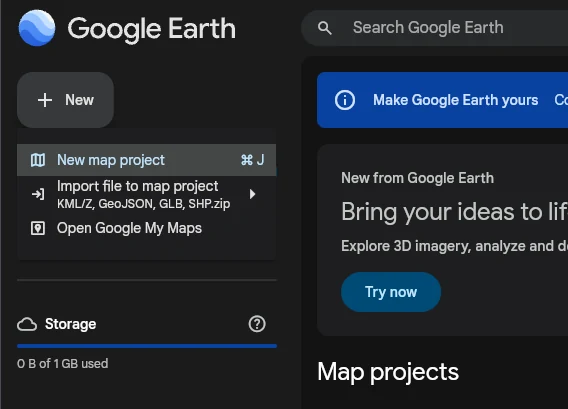
Click New (top left) and choose Import file to map project, then upload the file from your device. Google Earth creates a new project and imports into it in one step.
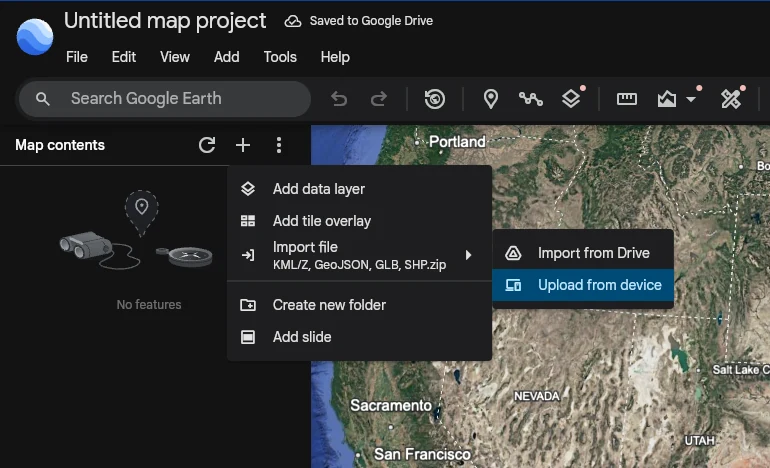
Already inside a project? In the Map contents panel click +, then Import file → Upload from device. Both routes lead to the same place.
-
Pick the
.kmz. -
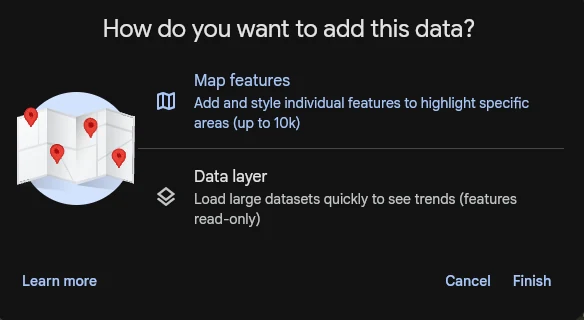
Google Earth asks How do you want to add this data? Choose Map features and click Finish. Not “Data layer”: a data layer is a flat, read-only rendering with Google’s own styling — the colours go, the folders collapse, and nothing is clickable. Map features keep all three. The “up to 10k” in the dialog is the per-project limit, and one Prepared Ground layer is well inside it.
-
A Data processing complete notice appears and the file shows up in Map contents as a folder, greyed out because everything inside it is hidden. Click the eye icon on it to show it, then expand it with the arrow to reach the folders inside — each of which has its own eye icon.
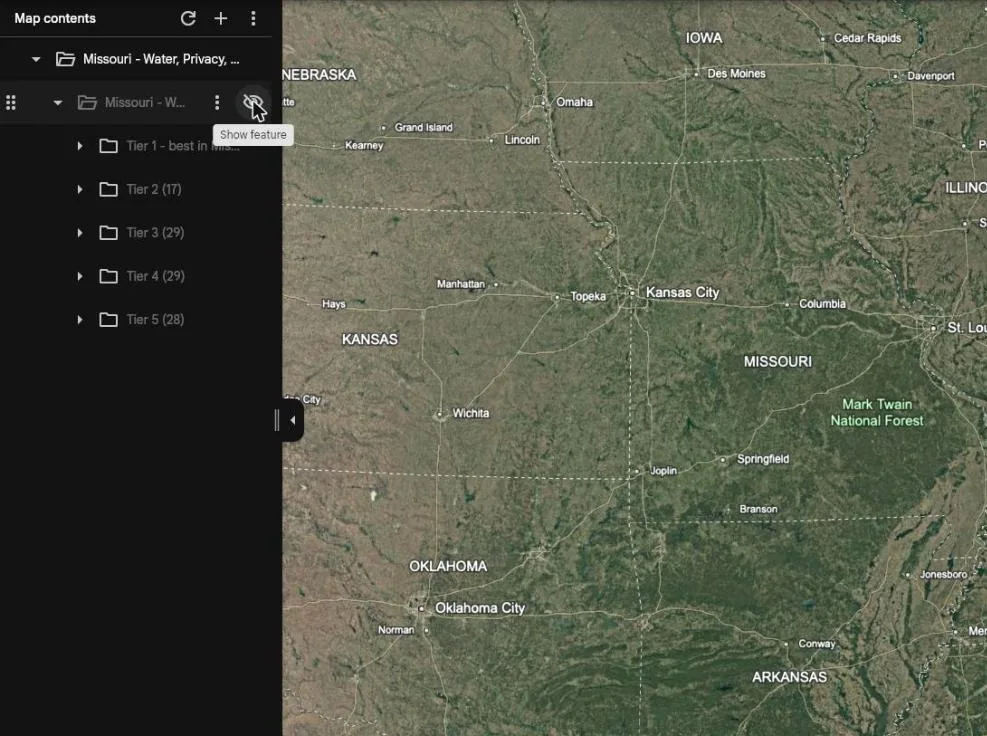
The project saves itself to Google Drive as you work and is listed under Map projects next time. Click the title — it starts as Untitled map project — to rename it.
Google Earth Pro (desktop)
- File → Open (Ctrl+O, ⌘+O on a Mac) and
pick the
.kmz. Dragging the file onto the globe does the same thing, and so does double-clicking it in a file manager if Pro is installed. - It lands in the Places panel under Temporary Places.
- Tick the top folder to draw it. Expand it with the triangle to reach the folders inside.
- To keep it, right-click the folder and choose Save to My Places, or File → Save → Save My Places. Pro also asks on exit.
Google Earth (mobile)
Open Projects, choose Open or Import, and pick the file from your phone’s storage. It works, but the screen is small for a county-scale overlay; use it for checking one place, not for filtering.
After it loads
- Everything arrives hidden. The top folder is greyed out on purpose, so the first click is always the eye icon (web) or the tick box (Pro) on it.
- Zoom out. These layers are drawn at county scale. If you are looking at one street, you are inside a single shape and will see nothing.
- Sub-folders are the filter. Every band or tier is its own folder with its own eye icon or tick box. Reading the map is mostly choosing which of them to draw.
How many files fit
Google Earth holds roughly 10,000 features and 250,000 vertices per project. The
Well Depth alone is about 73,000 vertices; the complete set is about 34,100 features and
1.8 million vertices. Import all of it at once and Google Earth refuses the file, or quietly
demotes it to a flat, read-only data layer with the colours gone. That is why every
Prepared Ground layer is a separate .kmz: you load the two or three a question
needs, read them together, then swap them out. The README.md in each download has a
table of what every layer costs, so you can see in advance what will sit together.
When it goes wrong
The most common mistake looks like this. In the import dialog, Data layer is the wrong choice:
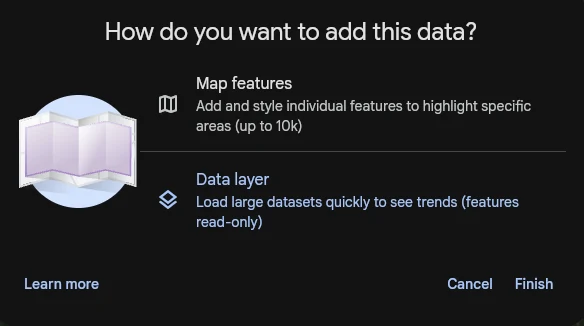
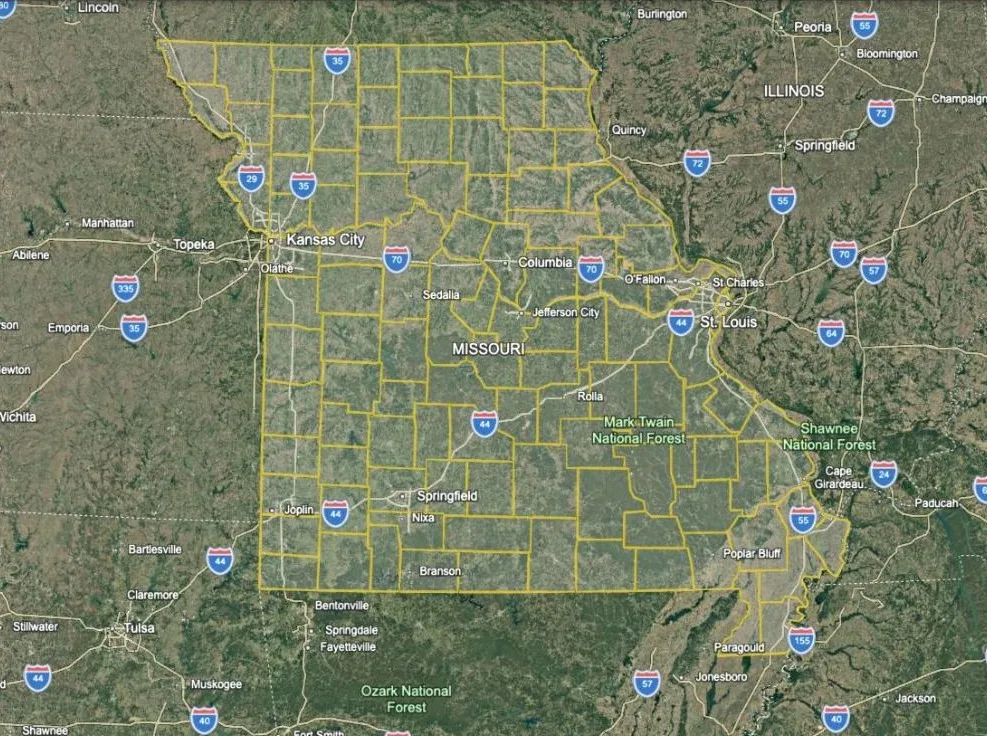
And this is what it produces: every county a bare outline, no tiers, no colours, nothing to click. Delete the layer and import again, choosing Map features.
| What you see | What happened | Fix |
|---|---|---|
| Nothing on the map | Top folder is still hidden, or you are zoomed in past county scale | Show it — eye icon on the web, tick box in Pro — and zoom out |
| Shapes drawn but no colour, no folders, nothing clickable | Imported as a data layer | Delete it and re-import, choosing Map features |
| “Too many vertices”, or the import is refused | Too much in one project | New project with fewer layers; check the README table |
| It opened in Google My Maps | You picked Open Google My Maps from the New menu | Use Import file to map project instead. My Maps has its own, much smaller limits |
The browser downloaded the .kmz instead of opening it |
Expected | Import it from inside Google Earth |
| Google Earth is sluggish | Too many layers drawn at once, or 3D buildings and photos on | Hide what you are not reading; simplify the map style |
It wants a .zip opened |
You picked the download, not the file inside it | Extract the zip first |
Next: the filtering guide. If you have not opened Google Earth before, How to use Google Earth first.